Broadside Bay guide: ships, weapons and how to win
Updated · 4 minute read
To win in Broadside Bay, pick a ship that suits your team, keep land between you and the enemy while you reload, and lock on with Q to lead moving ships. Each captain has one life, so a damaged ship that heads for a repair buoy is worth more than one that fights on.
Pick your ship
Every ship has its own hull, speed and slots. In a team of five, one Mender or Warden makes the other four better.
| Ship | Hull | Strengths |
|---|---|---|
| Gunner | 880 | Three deck guns. The all-rounder, and the easiest to learn. |
| Dart | 610 | Twin racing hulls: the fastest ship and the quickest to turn. Flank and get out again. |
| Bulwark | 1,420 | The slowest and toughest, with a bow shield. Built to hold a narrow passage. |
| Mender | 840 | A healing beam that repairs the most hurt ally in sight, and three support slots. |
| Warden | 1,000 | A disruptor that stuns, then slows, every enemy close by. Start an ambush with it. |
Know your seven weapons
Range is in metres. A gun fires once per cooldown until its magazine is empty, then reloads; the ring around your crosshair shows the reload, and charging weapons fill it as they charge.
| Weapon | Range | Fires every | Use it for |
|---|---|---|---|
| Blaster | 195 m | 2.1 s | Quick shells at medium range. Ten in a magazine, so it keeps firing. |
| Heavy torpedo | 260 m | 10 s | A slow, heavy shot along the waterline. Aim ahead of the target; land and sandbars stop it. |
| Mortar | 245 m | 6.5 s | Arcs over low cover into a 30 m blast ring that hits hard anywhere inside it. It can't hit ships closer than 45 m. |
| Rail lance | 340 m | 10 s | Hold for 1.15 s, then a fast, straight lance. Release early to cancel. |
| Homing rockets | 240 m | 7 s | Chase your locked target. With no lock they fly straight. |
| Longshot | 370 m | 5.5 s | The longest reach: a fast, straight precision shot. |
| Flare gun | 220 m | 10 s | A direct hit marks a ship for 6 seconds: your team sees it on the map and deals 20% more damage to it. |
Hit moving ships
- 1The target lock finds an enemy ship in view by itself: the crosshair glides onto it and stays on it. F (or the lock button on a phone) turns the lock on and off; Q and E switch to the ship on the left or right.
- 2The lock moves your crosshair, not your view. Look round freely by dragging; a moment after you let go, the view turns slowly back to the locked ship.
- 3The lock aims at where the ship is now. Fast shots land before it has gone far; for a slow one such as a torpedo against a ship sailing across you, turn the lock off with F and aim ahead of the ship yourself.
- 4Turn on AUTO FIRE with Shift to fire your gun whenever an enemy is lined up, and keep your mind on steering.
Sail smart
- On a keyboard, W, A, S and D sail the way you press, relative to where you look. On a phone, point the left stick where you want to go.
- Fire, then turn behind an island, a cliff or an ice wall while you reload. A ship in the open with empty guns is the easiest target on the map.
- When a ship hides behind low cover, use the Mortar: torpedoes stop at land and sandbars, but a mortar shell arcs over.
- Repair buoys restore 100 hull and then take 45 seconds to come back. Below a third of your hull, head for one.
- Stay in the Mender's sight if you have one: the healing beam needs a clear line.
Play each map
- Pick a map on the card at the bottom left of the harbour, or leave it on Random for a different map every match.
- Neon Circuit: a gate wall before each bay sends you left or right, then three walled-off ways: a lit tunnel to the reactor core, or a channel down either flank.
- Foundry Docks: rows of steel blocks with covered alleys between them. No alley runs straight on, so a fight can come from any corner; listen for the shots.
- Halo Station: four spoke tunnels lead into a ring canal round the hub. Fights in the ring go round and round, so a Bulwark at a spoke's door is hard to pass.
- Serpent Rapids: a winding river between canyon walls, and a side channel down each flank with a current. Sandbars in the bends stop torpedoes but not shells.
- Frost Gate: an ice maze with narrow doors, zig-zag corridors, floe fields with a drift current, and a glowing red gate in a ring of ice. Short sightlines favour the Blaster, and a Bulwark can hold a door on its own.
How a match is won
Every captain has one life. Sink every enemy ship to win early. After five minutes, the team with more ships still afloat wins, and if that is even, the team with more hull left.
So in the last minute, a ship that runs to a repair buoy can win the match for its team, while a brave last charge can lose it.
Get stronger between matches
- Win coins, experience, trophies and a crate. Open crates for gear in four rarities: Common, Rare, Epic and Legendary.
- Merge three copies of the same item and rarity into one of the next rarity, and level items up with coins.
- Each win earns 30 trophies. Seven leagues run from the Shallows to the Maelstrom, and higher leagues win better crates.
- Daily and weekly quests pay coins, experience and crates, and every captain level brings a Small crate and 150 coins.
Questions
- What is the best ship for beginners?
- The Gunner. Three guns and an average hull make it forgiving while you learn to aim and use cover.
- How do I hit a ship that keeps moving?
- The lock keeps your crosshair on the ship, and fast shots land before it has gone far. For a slow shot such as a torpedo, press F to turn the lock off and aim ahead of the ship yourself.
- Why won't my Mortar hit a ship next to me?
- The Mortar can't hit ships closer than 45 metres. Use a deck gun up close.
- How do I heal my ship?
- Use a Repair kit from your support slots, sail to a repair buoy for 100 hull, or stay near a Mender's healing beam.
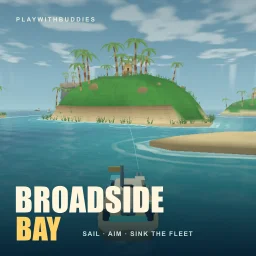
Play Broadside Bay
1-8 players · free in your browser · all about Broadside Bay
Checking your sign-in…
More guides
Written with the help of AI tools from each game's own rules, and checked against the game.